
Homemade Natural Face Masks: Recipes with Honey, Clay and Herbs
IMPORTANT: Before applying any new mask to your face, always do a patch test on a small area of skin (such as the inner forearm or behind the ear) and wait 24 hours. People with known allergies to bee products (honey, propolis, pollen), to tree nuts (walnuts, almonds), or to certain plants should be especially cautious. Avoid applying masks to skin with open wounds, burns, active eczema or severe dermatitis. If you have a dermatological condition (rosacea, psoriasis, seborrheic dermatitis) or are using retinoids or acid treatments, consult a dermatologist before using homemade masks. No natural remedy replaces professional medical advice when it comes to serious skin problems.
Aunt Veronica, the village seamstress, was past seventy and had skin that many younger women envied. When her neighbors asked what expensive cream she used, she would laugh and point to her pantry: a jar of honey from the hives in her garden, a bag of oat flakes, and a little pouch of yellow clay dug from the riverbank. “Beauty isn’t bought in town,” she would say, “it’s made at home, from what the earth gives us.” Every Sunday evening, after finishing her sewing, she would put a mix of honey and cooked oats on her face, sit half an hour with her eyes closed on the chair by the stove, then wash it off with lukewarm water in which she had placed a few chamomile petals.
The image of her stayed with me because it captured a whole philosophy: caring for the skin not as a luxury, but as a natural gesture tied to the rhythm of the home and of nature. Today, when shelves are full of cosmetic products with endless lists of hard-to-pronounce ingredients, many people are returning to the simple recipes of their grandmothers. And the truth is that, for basic skincare, our kitchens hide real treasures.
Homemade natural face masks are cosmetic mixtures made from food ingredients and herbs, applied to the skin for a short time to hydrate, cleanse, soothe or revitalize the complexion. Their tradition is universal — from the honey masks of the ancient Egyptians, to the clay used by women across the Balkans, to the yogurt mixtures of rural kitchens. They are prized because they use fresh ingredients, free of preservatives, synthetic fragrances or dyes, and because they can be tailored to every skin type.
Table of Contents
- Why homemade natural masks work
- The basic ingredients and what each does
- How to identify your skin type
- Mask recipes for every skin type
- Golden rules for correct application
- How often to apply a mask
- How to store and use the ingredients
- Lifestyle for beautiful skin
- Practical tips and common mistakes
- Conclusion
- Frequently Asked Questions
Why homemade natural masks work
The skin is the body’s largest organ and a living layer that reacts to what we put on it. Many kitchen ingredients contain substances that, applied locally, can have a visible effect on the complexion. Honey, for instance, is humectant — meaning it attracts and holds water — and has antibacterial properties long recognized by folk tradition. Clay absorbs excess sebum and impurities, oats soothe irritation, and yogurt contains lactic acid, which gently exfoliates the superficial layer of dead cells.
Unlike industrial products, homemade masks contain no preservatives, which is both their advantage and their limitation: they are fresh and “alive,” but must be prepared in small amounts and used immediately. Studies suggest that many traditional ingredients do have beneficial properties for the skin, but their effect is one of maintenance and balance, not a miracle treatment. A good homemade mask will not erase wrinkles overnight, but it can keep the skin hydrated, clean and glowing, supporting its long-term health.
Another reason these recipes are so cherished has to do with the relationship we build with ourselves. Preparing a mask, applying it slowly and sitting quietly for twenty minutes is, in itself, a small relaxation ritual. And stress, as anyone knows, shows on the face.
The basic ingredients and what each does
Before the recipes, it is worth knowing the “building blocks” from which we make masks. Each ingredient has a role and suits certain skin types.
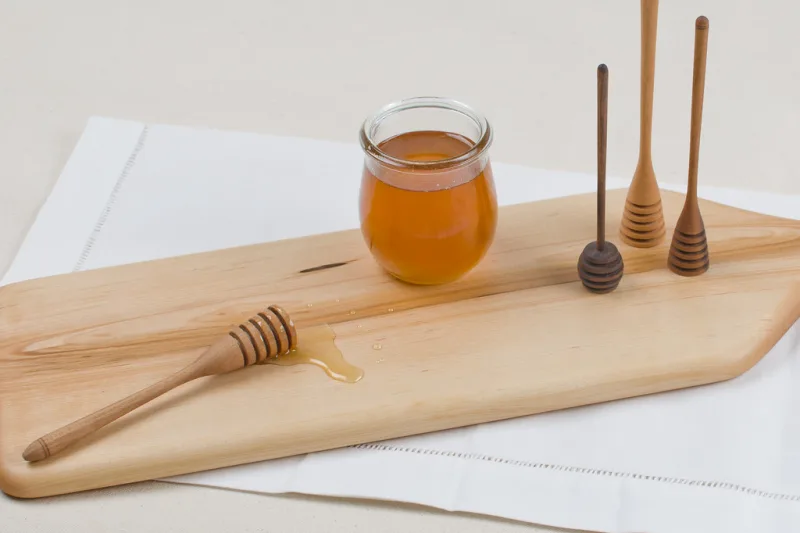
Honey is probably the undisputed star. It hydrates, soothes, has an antibacterial effect and helps maintain skin elasticity. It suits almost all skin types, including sensitive or acne-prone skin. Ideally, use raw, unpasteurized honey from a trusted beekeeper.
Clay (green, yellow, white/kaolin, pink, bentonite) is an extraordinary natural absorbent. Green clay and bentonite are the strongest and suit oily and combination skin; white clay (kaolin) is the gentlest and works for sensitive and dry skin; pink clay is a balanced middle ground. Clay draws impurities to the surface, absorbs sebum, and leaves the skin clean and matte.
Oat flakes (finely ground or cooked) soothe irritation, reduce redness and exfoliate very gently. They are ideal for sensitive, reactive skin or skin irritated by sun or wind.
Yogurt (full-fat, plain, no sugar) contains lactic acid, a mild exfoliant that softens the layer of dead cells and brightens the complexion. It also calms reddened skin.
Avocado and vegetable oils (olive, coconut, sweet almond, jojoba) are rich in fatty acids and intensely nourish dry and mature skin.
Cucumber, tomato and lemon are cooling, astringent ingredients. Cucumber decongests and hydrates, tomato tones, and lemon juice (used with great caution and diluted) has a brightening effect — but be careful, lemon makes the skin photosensitive.
Herbs — chamomile, calendula, linden, mint, rosemary — are used as concentrated infusions, either as the liquid base for masks or for a final rinse. Chamomile and calendula soothe, mint cools, rosemary tones.
Egg white and yolk round out the arsenal: egg white is astringent and gives a temporary “lifting” effect, suiting oily skin, while the yolk nourishes dry skin.
How to identify your skin type
Before choosing a recipe, it is essential to know your skin type, because the wrong mask can do more harm than good.
Normal skin: balanced, neither too oily nor too dry, with fine pores and a velvety look. It is the easiest to maintain.
Oily skin: shiny, especially in the T-zone (forehead, nose, chin), with enlarged pores and a tendency to breakouts and blackheads. It needs cleansing and sebum balancing.
Dry skin: a tight feeling, matte appearance, sometimes with flaky areas. It needs hydration and nourishment.
Combination skin: oily in the T-zone and normal or dry on the cheeks. The most common type, it needs zone-by-zone care.
Sensitive skin: reddens easily, reacts to products and external factors, may be prone to itching. It needs soothing ingredients and a great deal of gentleness.
To test your skin, wash in the evening with a gentle product, apply nothing, and observe how your skin looks in the morning before washing: if it shines all over, it is oily; if it feels tight, it is dry; if it shines only in the T-zone, it is combination.
Mask recipes for every skin type
Hydrating honey and yogurt mask (normal and dry skin)
This is a universal recipe, gentle and nourishing.
You need:
- 1 teaspoon of raw honey
- 1 tablespoon of full-fat plain yogurt
- a few drops of sweet almond oil (optional, for very dry skin)
Preparation: Mix the honey with the yogurt in a small bowl until you get a smooth paste. Apply to clean skin, avoiding the eye area, and leave for 15-20 minutes. Rinse with lukewarm water and gently pat dry with a soft towel. The skin is left soft, hydrated and glowing.
Purifying green clay mask (oily and combination skin)
For skin that shines and is prone to imperfections.
You need:
- 1 tablespoon of green clay (or bentonite)
- still water or cooled chamomile infusion, enough to form a paste
- 2-3 drops of apple cider vinegar (optional)
Preparation: Place the clay in a ceramic or glass bowl (not metal, as clay can react). Gradually add the liquid, stirring with a wooden spoon, until you get a creamy, lump-free paste. Apply an even layer to the face, avoiding the eye and lip contour. Leave for 10-15 minutes — important: do not let the clay dry out completely and crack, as it can dehydrate the skin. Rinse with lukewarm water using gentle circular motions.
Soothing oat and honey mask (sensitive and irritated skin)
Ideal after sun or wind exposure, or for reactive skin.
You need:
- 2 tablespoons of finely ground oat flakes
- 1 teaspoon of honey
- 2-3 tablespoons of warm milk or calendula infusion
Preparation: Mix the oats with the warm liquid and let them soak for 5 minutes. Add the honey and blend. Apply the warm (not hot) paste to the face and leave for 15 minutes. Rinse gently. This mask reduces redness and leaves the skin velvety.
Nourishing avocado mask (dry and mature skin)
A hydration bomb for thirsty skin.
You need:
- half a ripe avocado
- 1 teaspoon of honey
- 1 teaspoon of extra-virgin olive oil
Preparation: Mash the avocado with a fork until it becomes a fine paste, add the honey and oil, and mix well. Apply a generous layer to the face and neck and leave for 20 minutes. Rinse with lukewarm water. The skin is left nourished, supple and glowing.
Cooling cucumber and yogurt mask (all skin types, summer)
Perfect for hot days, when the skin needs freshness.
You need:
- a quarter of a cucumber, finely grated
- 1 tablespoon of yogurt
- a few chopped mint leaves (optional)
Preparation: Mix all the ingredients and apply to clean skin. Leave for 15 minutes, then rinse. It decongests, hydrates and refreshes tired skin.
Astringent egg white and lemon mask (oily skin, enlarged pores)
To tighten pores and reduce shine, but to be used with caution.
You need:
- 1 egg white
- a few drops of lemon juice
Preparation: Lightly beat the egg white with a fork until foamy, then add the lemon juice. Apply to the face and leave for 10 minutes, until it tightens the skin. Rinse with cold water. Caution: because of the lemon, apply this mask only in the evening and do not expose your skin to the sun afterward, to avoid pigmentation spots.
Golden rules for correct application
Whatever the recipe, a few principles make the difference between a pleasant experience and an unpleasant irritation.
Always apply the mask to clean skin. Wash beforehand with a gentle product so the mask can act on skin free of makeup and sebum.
You can open the pores by holding your face over a bowl of warm water and steam (with a towel over your head) for a few minutes before the mask — this helps the ingredients penetrate better.
Avoid the eye area and the lips, where the skin is very thin and sensitive.
Apply the mask with clean fingers or a cosmetic brush, in an even layer, working from the center outward.
Respect the action time. More is not better — clay dried completely or an acidic mask left on too long can do harm.
Rinse with lukewarm water, never hot, and finish with a cold-water rinse or a herbal infusion to close the pores.
After the mask, apply a moisturizer suited to your skin type, to “seal in” the benefits.
How often to apply a mask
Frequency depends on skin type and on the mask. As a general rule, once or twice a week is enough for most people. Oily skin can benefit from a clay mask twice a week, while sensitive or dry skin is content with a hydrating mask once a week. Overdoing it — daily masks, especially exfoliating or astringent ones — can disrupt the skin’s natural barrier and make it more reactive. Less, but consistent, is the key.
How to store and use the ingredients
Because homemade masks contain no preservatives, the golden rule is to prepare only as much as you use on the spot. Do not save leftovers for another time — bacteria multiply rapidly in fresh mixtures.
Honey keeps at room temperature, away from light. Dry clay is stored in a closed jar in a dry place and has a long shelf life. Yogurt, avocado and vegetables are used fresh. Herbal infusions are made fresh or kept no longer than a day in the refrigerator.
Always use clean utensils — a ceramic or glass bowl, a wooden spoon — and washed hands, so you do not introduce microbes into the mixture.
Lifestyle for beautiful skin
No mask, however good, makes up for a lifestyle that does not support the skin. Beauty comes from within, and folk tradition always knew this.
Hydration is essential: drink enough water throughout the day. Skin dehydrated from within cannot be saved by products applied only on the outside.
Quality sleep is when the skin regenerates. “Beauty sleep” is not an empty phrase.
A diet rich in vegetables, fruit, good fats (nuts, fish, olive oil) and low in sugar and fried food shows on the complexion.
Sun protection is the single most important anti-aging gesture. Excess sun ages the skin more than anything else.
Gentle cleansing in the evening, to remove makeup and impurities, completes the routine.
And not least, stress management — the skin is the mirror of our inner state.
Practical tips and common mistakes
Mistake no. 1: Skipping the allergy test. Many people apply a new ingredient directly to the face and then end up with irritation. Always test on a small area of skin 24 hours in advance.
Mistake no. 2: Letting the clay dry out completely. When clay cracks on the face, it starts pulling water from the skin, dehydrating it. Mist a little water or rinse before it dries completely.
Mistake no. 3: Using undiluted lemon juice during the day. Lemon is strongly photosensitizing and can cause pigmentation spots with sun exposure. Use it diluted, rarely, and only in the evening.
Mistake no. 4: Applying the mask to unwashed skin. The mask cannot act over makeup and sebum; the result is disappointing and pores can become clogged.
Mistake no. 5: Overdoing the frequency. Daily masks, especially exfoliating ones, damage the skin’s barrier. Stick to once or twice a week.
Mistake no. 6: Rinsing with hot water. Hot water dries and irritates the skin. Use lukewarm water, then cold.
Mistake no. 7: Using metal utensils with clay. Clay can react with metal; use a ceramic or glass bowl and a wooden spoon.
Mistake no. 8: Neglecting moisturizing after the mask. Once you have cleansed and “opened” the skin, you need to hydrate it with a suitable cream, otherwise it can dry out.
Conclusion
Homemade natural face masks are an accessible, pleasant and authentic way to care for your skin with ingredients you already have in your kitchen. Honey, clay, oats, yogurt, avocado and herbs each offer specific benefits and can be combined into recipes tailored to your skin type. The secret lies not in a single miracle ingredient, but in consistency, gentleness and understanding your own skin. As Aunt Veronica said, beauty is made at home, with patience and with what nature gives us. Used correctly, with a prior patch test and common sense, these masks can become a small weekly ritual of relaxation and self-care — a gift you give yourself.
Frequently Asked Questions
How often should I apply a natural face mask? For most skin types, once or twice a week is ideal. Oily skin can use a clay mask twice a week, while sensitive skin is content with a gentle hydrating mask once a week. More is not better — overdoing it can disrupt the skin.
Can I store a prepared mask for another time? It is not recommended. Homemade masks contain no preservatives, and bacteria multiply quickly. Prepare only the amount you use immediately and discard any leftovers.
Which mask is good for acne? The purifying green clay or bentonite mask helps absorb sebum and clean the pores. Honey, due to its traditional antibacterial properties, is also welcome. However, moderate or severe acne requires dermatological consultation, and a mask is only a support, not a treatment.
Is lemon juice safe on the face? Lemon can have a brightening effect, but it is acidic and strongly photosensitizing. Always use it diluted, in small amounts, only in the evening, and do not expose yourself to the sun afterward. People with sensitive skin would do well to avoid it entirely.
Which mask is suitable for dry skin? Masks rich in fats and hydrating ingredients are ideal: avocado with honey and olive oil, or honey with yogurt and almond oil. These intensely nourish and hydrate thirsty skin.
Can I use these masks if I have sensitive skin? Yes, but choose gentle ingredients — oats, honey, chamomile, yogurt — and avoid lemon, strong clay and aggressive exfoliants. Always do a patch test and introduce ingredients one at a time, so you can identify any reactions.
Why should I not let the clay dry completely on my face? Because dry clay begins to pull moisture out of the skin, dehydrating it and potentially causing a feeling of tightness or irritation. Ideally, rinse it off while it is still slightly damp, before it cracks.
Should I use a cream after the mask? Yes, it is recommended. After the mask has cleansed and prepared the skin, a moisturizer suited to your skin type “seals in” the benefits and prevents dryness. This final step completes the care routine.